Since I’ve been using a lot of VMs lately testing out LibreOffice bugs, and one of my fellow authors may well be using VMs sometime soon to try out Linux, it’s time to write this post. (Yes! He’s leaving the dark side. Doesn’t want Microsoft collecting more information about him that Google and Facebook combined via Windows 10. Also doesn’t want to pay for or see advertisements while playing Solitaire.)
Most people make the same mistakes with Oracle Virtualbox. They get in a hurry and don’t do the prep work. They simply visit virtualbox.org, download, install, and immediately try to set up a 64-bit operating system in a VM.
Why do I only see 32-bit options for creating a VM?
Because you didn’t do the prep work. Most Intel based new computers have virtualization technology built into the processors (I don’t know about AMD right now). By default, the virtualization technology is not enabled. Theoretically it could be a security risk. In reality some of it can cause your primary operating system to run a tad slower.
Power off your computer.
After it has sat for a bit, turn it on and watch for a message telling you to hit some key to get into system menu, then hit that key.
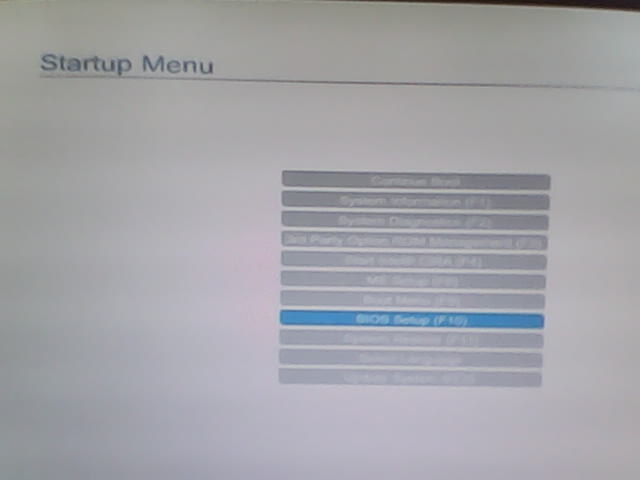
Sorry for the blurry phone pic, but on my HP EliteDesk it tells me to hit the Escape key and that brings up the startup menu. You can see I arrowwed down to the BIOS Setup which, had I known could have been accessed by hitting F10 when the Escape key message was up.
You may not see a message about which key to hit during power up. For security or faster boot or some other reason it is disabled on many laptop and desktop computers. The Internet is your friend. If you know the make and model of your computer someone will have the key you need to hit posted on-line. Tell Lycos to go find it. Woof!
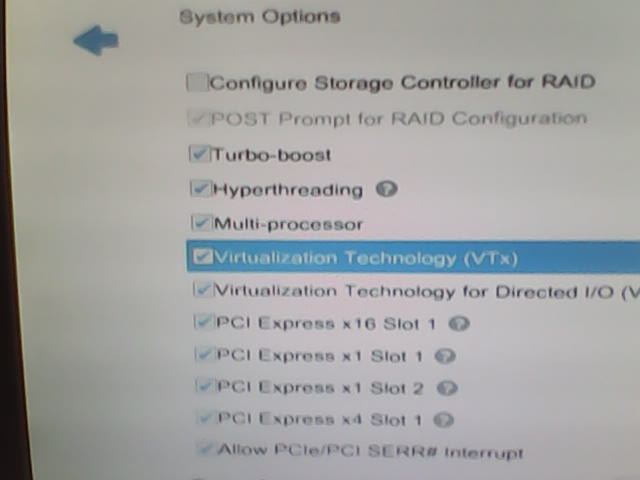
I have the first line highlighted which needs to be enabled. You generally find it on a Systems Options or Advanced options page. You definitely need that one to install a 64-bit OS in a VM.
The one right below it has many people with mixed opinions. It can make your virtual machines access disk faster. It can also make your primary OS access disk a tad slower. If all you are doing is running a word processor or checking email you won’t notice. If you are doing something I/O intensive like compiling the entire Qt framework from source, yeah. Since you are probably doing that within the VM you are about to install you definitely want it turned on.
You save and continue booting. Now you create a new VM, answering a few questions. Do not just launch the VM after that to install your ISO file. You will have a horribly slow time.
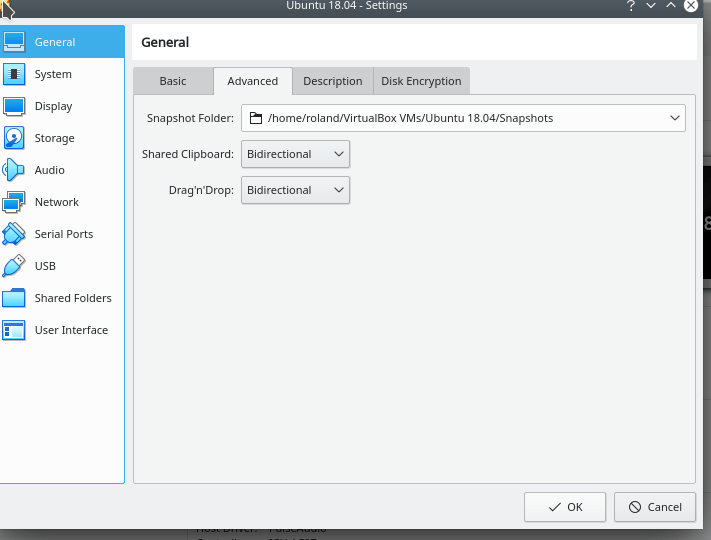
Highlight your new VM and click the settings toolbar button. Go to the Advanced tab of the general item and set clipboard along with Drag’n’Drop to bidirectional. It won’t work out of the gate until you install Guest Additions, but you really need it enabled before you install that.
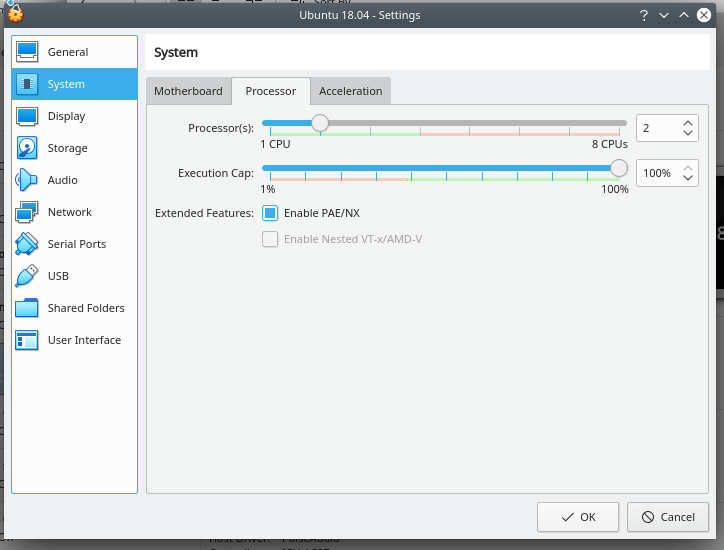
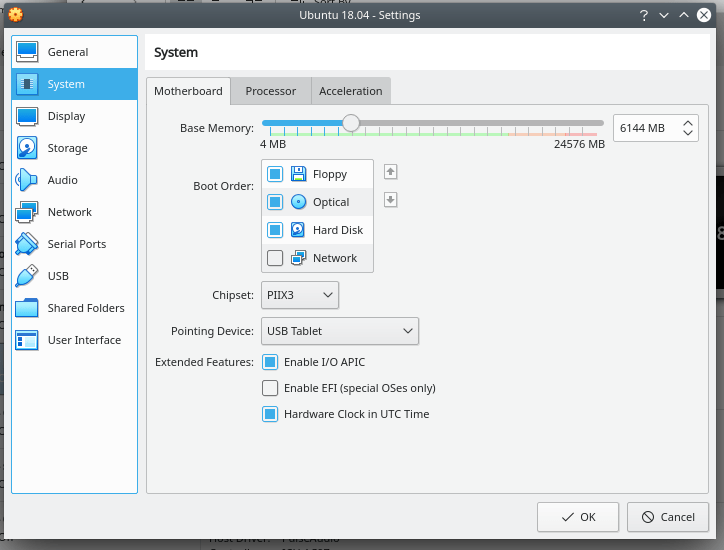
You need to go to the system item and set the number of CPUs and motherboard options. At least you need to verify the motherboard options. If the OS you wish to install can use it, I/O APIC can really help speed I/O up.
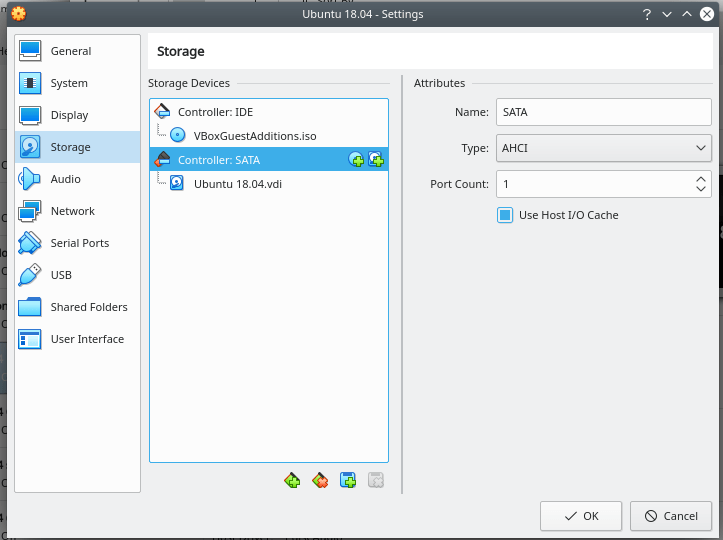
Assuming you have a SATA controller in your computer you definitely need to check the “Use Host I/O Cache”. By default it is not checked for most newly created VMs. If you don’t have this checked installing Ubuntu 18.04 will take close to 45 minutes. It takes under 10 with this checked.
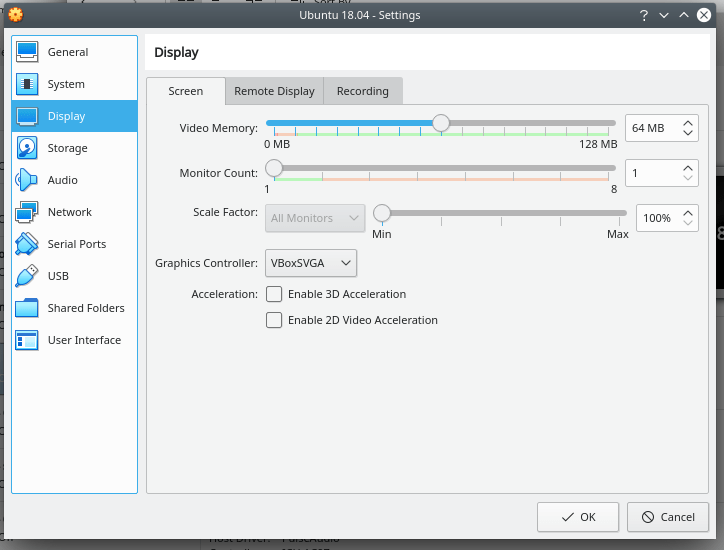
The default display memory is not sufficient for many newer VMs. I always set it to at least 64 MB.
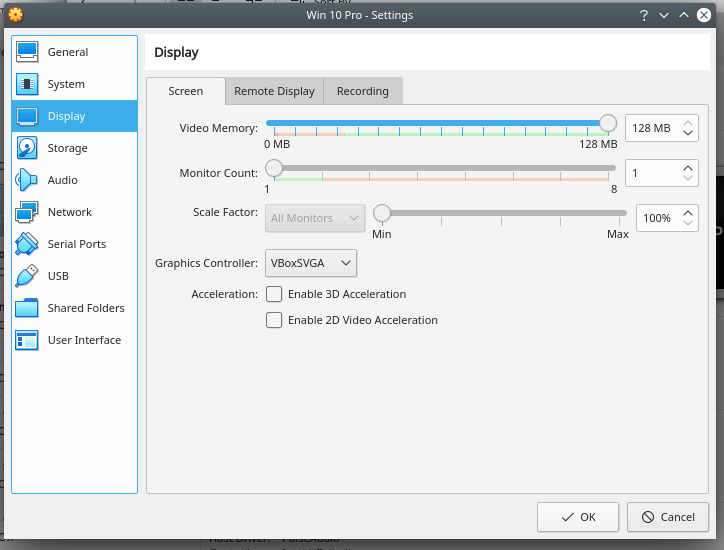
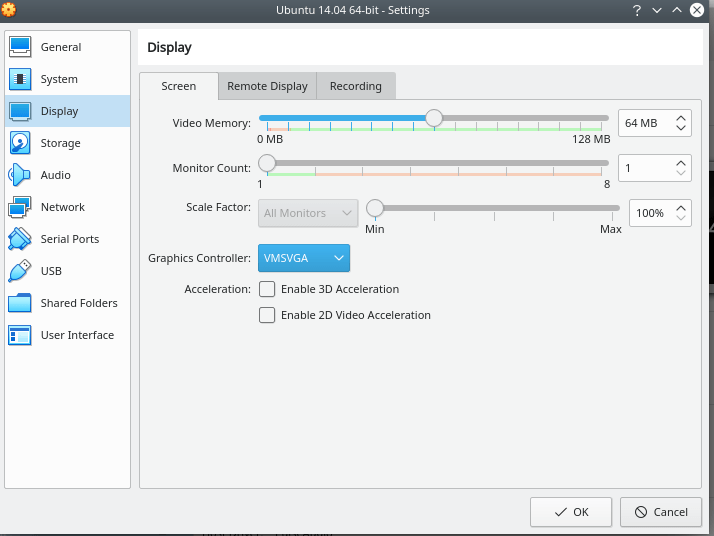
Some people I know just set it to 128 MB no matter what. The “Graphics Controller” combobox can be another issue. The latest doesn’t work for all Ubuntu based distros. You find this out either after install or after an update when you think the OS didn’t boot because all you see is a black screen. It booted. It just can’t talk to your video setup. When that happens power down the VM and change the settings as follows:
The other thing you probably want to do is create a shared folder. This makes things easier if you want to transfer some files from your host computer to your VM. You do that here.
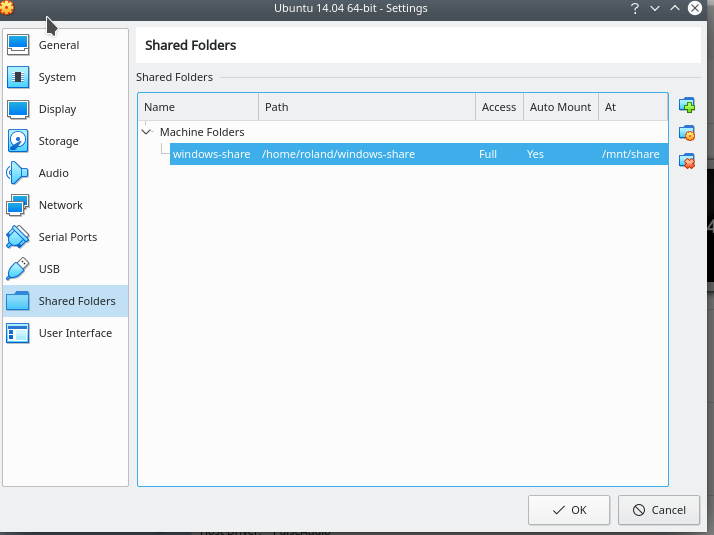
With Ubuntu based distros you need to have it set to full access and auto mount. Don’t worry, the auto mount doesn’t actually work. It does seem to work for Window VMs. Well, it does work, just not like you think.
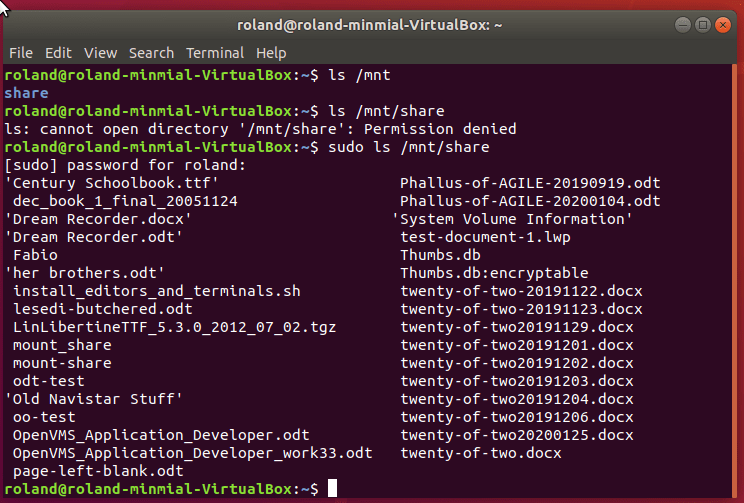
You can copy stuff in and out but you have to either run as root or use sudo. Most people will want to be able to directly access the files so we have another method discussed in a bit.
After you install your OS, reboot, then apply all updates and reboot again, you need to open a terminal and type the following:
mkdir bin
mkdir share
sudo apt-get install build-essential
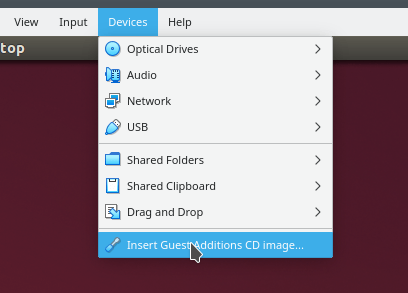
Then close your terminal once it is completed. The top of the VM window will have a menu. Under Devices is where you find “Insert Guest Additions CD image”.
You need the build-essential package so it can compile and link a custom kernel. If you don’t have it you will get what it can provide you for a kernel which doesn’t always work. Now you can use the GUI folder management of your Ubuntu flavor to navigate to your “bin” folder in your home directory. Right click in the folder an create an empty text file. Rename the text file to mount-share. Right click on the file and open in the default text editor. Paste in the following:
#!/bin/bash
#
# This is a helper script for developers using VMs.
# It is especially important if you have your Linux VM running under
# a Linux system or derivative such as the current MAC OSX.
#
# Prep work is required before running this script.
#
# Create a directory called share in your host home folder.
# Create a directory called share in your linux-vm home folder.
# Click the shared folders option under Devices in VM.
# Choose your share folder on host. Check auto-mount and perm.
#
# When you restart your VM you will find /media/sf_share which is owned by root.
# You will notice you can sudo cp into that folder, but you cannot sudo cp
# out of it.
#
# Create a bin folder under your linux-vm home. Copy this script to it and
# make certain the executable bit is set. chmod +x mount_share
#
# At a later date I added a win_iso_files following the instructions above.
# You may wish to comment that mount out if you don't have/need a folder
# containing all of the ISO files use don this project.
#
sudo mount -t vboxsf -o uid=$UID,gid=$(id -g) windows-share $HOME/share
Exit saving the file. Right click on the file again and select properties. Under the permissions tab you want to check the box which allows executing the file.
Now open a terminal window and type mount-share. When you look in the share directory you should see whatever files you copied from your host computer into that directory. Any time you need to transfer files from your host to your VM you can simply copy them into your shared folder then mount that folder in your VM. Yes, the shared directory will be mounted in multiple places.
